Balloon sculpting is a fun and creative activity that brings joy to both the creator and the audience. Whether you’re preparing for a birthday party, a family gathering, or just want to impress your friends, mastering a few simple balloon designs can elevate any event. In this article, we’ll explore ten easy balloon designs perfect for beginners, providing step-by-step instructions and tips to help you become a budding balloon artist.
Balloon Sculpting : The Classic Balloon Dog
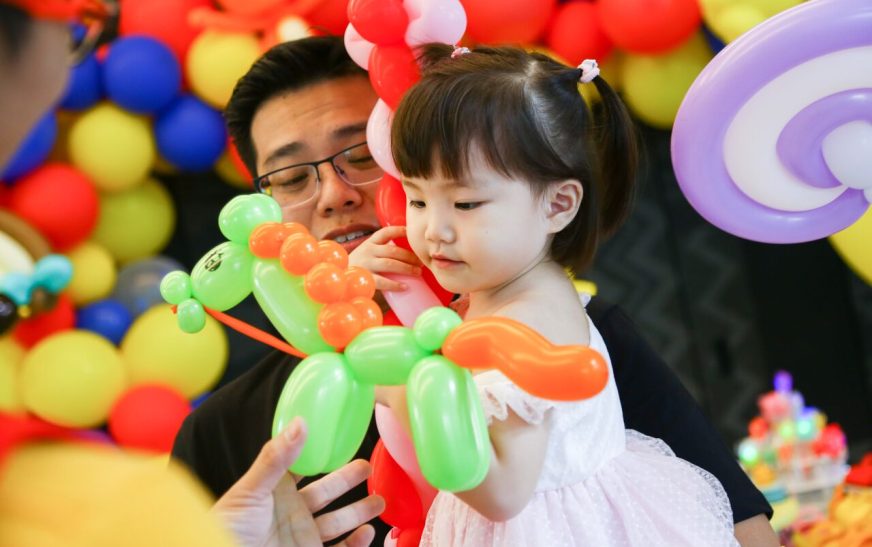
To start your balloon sculpting journey, the classic balloon dog is a great choice. For this design, you will need one long balloon (260 size) and a pump, although a pump is optional, it is recommended for ease of inflation. Inflate the balloon, leaving about a 4-inch tail at the end, which will give you enough room to twist and prevent the balloon from bursting. Once inflated, tie a knot at the end of the balloon. To create the dog’s head, twist a small section (about 2 inches) at one end to form the snout. Next, twist a larger section (about 4 inches) for the dog’s neck. For the ears, twist two small sections (about 2 inches each) and fold them down. Create the body by twisting a section about 6 inches long, and then make the legs by twisting two sections (about 4 inches each) and separating them. Finally, twist a small section for the tail. Congratulations! You’ve just made a classic balloon dog.
Simple Balloon Flower
The simple balloon flower is another delightful design that will brighten any occasion. For this project, you will need one long balloon (260 size) and a short balloon (160 size) or another long balloon. Inflate the long balloon, leaving about a 4-inch tail, and tie it off. Create three equally-sized petals by twisting three sections (about 3 inches each). Next, to form the center of the flower, take the short balloon and inflate it, leaving a 1-inch tail, then tie it off. Push the center balloon into the middle of the petals and twist it to secure everything in place. For the stem, take the remaining long balloon and twist it to create a long section under the flower. Your balloon flower is ready to brighten up any space!
The Heart Shape
Creating a heart shape with balloons is a sweet and simple design perfect for expressing love. For this project, you will only need one long balloon (260 size). Inflate the balloon, leaving about a 6-inch tail, and tie a knot at the end. To create the top curves of the heart, twist the balloon into two equal loops. Pinch the balloon just below the loops and twist to secure the loops together. To complete the heart, bend the remaining balloon down to form the bottom point of the heart and twist it once more. Now you have a lovely balloon heart, perfect for any romantic occasion!
Balloon Sculpting : Balloon Sword
For budding knights and adventurers, a balloon sword is a fantastic design that’s sure to impress. To make a balloon sword, you’ll need one long balloon (260 size). Inflate the balloon, leaving about a 5-inch tail, and tie a knot at the end. Twist a section (about 4 inches) for the handle, securing it by twisting another small section at the end. For the blade, twist a long section (about 18 inches). To add a little flair to your sword, twist the end into a loop for a guard. You now have a balloon sword that any knight would be proud to wield!
Balloon Caterpillar
The balloon caterpillar is a colorful and creative design that’s easy to make. For this project, you will need three long balloons (260 size) in different colors. Inflate the first balloon, leaving about a 4-inch tail, and tie it off. Twist a section (about 6 inches) and then a smaller section (about 3 inches) to create the first segment of the caterpillar. Repeat this process with the second and third balloons, twisting them together to form the caterpillar’s body. For eyes, you can use a permanent marker or stick on googly eyes at one end of the first balloon. Your colorful balloon caterpillar is now complete!
Simple Balloon Butterfly
Creating a simple balloon butterfly is a great way to practice your twisting skills. For this design, you will need one long balloon (260 size). Inflate the balloon, leaving about a 6-inch tail, and tie it off. Create the wings by twisting the balloon into two equal loops, ensuring they are about the same size. Pinch the balloon just below the wings and twist to secure. The remaining tail can be twisted to form the body of the butterfly. Your balloon butterfly is ready to flutter around and add some charm to your décor!
Balloon Turtle
A balloon turtle is a delightful and whimsical creation that kids will love. To make this design, you will need one long balloon (260 size) and one round balloon (5-inch size). Inflate the long balloon, leaving about a 4-inch tail, and tie it off. Create a small loop at one end for the turtle’s head, then twist a larger loop for the turtle’s shell (about 8 inches). For the legs, twist two smaller sections (about 3 inches each) and secure them to the shell. Inflate the round balloon and use it as the turtle’s shell by placing it on top of the twisted section. Now you have a cute balloon turtle ready to swim into fun!
Balloon Sculpting : Balloon Airplane
The balloon airplane is a fun design that encourages imaginative play. To create this design, you will need one long balloon (260 size). Inflate the balloon, leaving about a 6-inch tail, and tie it off. Create the wings by twisting two equal sections (about 4 inches each) and folding them back. Twist the remaining balloon into a longer section for the body of the airplane. For the tail, twist a small section at the end of the balloon. Your balloon airplane is ready to take off into a world of adventure!
Balloon Sculpting : Balloon Octopus
Making a balloon octopus is a creative way to practice twisting techniques. For this project, you will need one long balloon (260 size). Inflate the balloon, leaving about a 4-inch tail. Create a small loop at one end for the head, and then twist eight long sections for the legs (about 4 inches each) from the body of the balloon. For added flair, you can curl the legs slightly by wrapping them around your fingers. You now have a fun balloon octopus ready to crawl along!
Balloon Snail
The balloon snail is a unique and easy design that’s sure to delight. To create this adorable snail, you will need one long balloon (260 size) and one round balloon (5-inch size). Inflate the long balloon, leaving about a 6-inch tail, and tie it off. Create a spiral by twisting the balloon around itself, starting from one end. Inflate the round balloon for the snail’s shell and place it on top of the spiral. For the head, twist a small section at the other end of the balloon. Your balloon snail is now ready to crawl along and bring smiles!
Conclusion
Balloon sculpting is a delightful way to express your creativity and bring smiles to those around you. With these ten easy designs, you can start your journey into the world of balloon art. Remember to practice, be patient, and most importantly, have fun! Once you feel comfortable with these basic designs, you can explore more complex shapes and even develop your unique creations. Happy sculpting!
FAQs
1. What types of balloons are best for Balloon Sculpting ?
The best balloons for sculpting are long balloons, typically referred to as “260 balloons.” They are versatile and easy to manipulate.
2. Do I need a pump to inflate the balloons?
While you can inflate balloons by mouth, a pump is recommended, especially for larger or long balloons, as it makes the process easier and reduces the risk of popping.
3. How long do balloon sculptures last?
Balloon sculptures can last anywhere from a few hours to a few days, depending on the environment. Keeping them indoors and away from sharp objects can extend their lifespan.
4. Can I use regular balloons for sculpting?
While you can use regular balloons, they are not as durable or easy to shape as long balloons designed specifically for sculpting.
5. What is the best way to store leftover balloons?
Store unused balloons in a cool, dry place away from direct sunlight. Keep them in their original packaging or a zip-lock bag to prevent them from becoming damaged.
Also read: Singapore Tourist Map: 10 Hidden Gems You Must Visit

